How to Install Surfshark VPN on Any Device (2026 Step-by-Step Guide)
Learn how to install Surfshark on every device — Windows, Mac, iPhone, Fire Stick, Android, Linux, and more — with step-by-step setup in under 5 minutes.
If you need to know how to install Surfshark quickly, you’re in the right place. You’ve got a subscription — or you’re about to get one — and you need it running on your devices fast. The problem is that the process to download Surfshark and get it set up looks different on a Windows laptop versus an iPhone versus an Amazon Fire Stick, and most guides only cover one platform at a time.
This guide covers every device Surfshark officially supports. Each section is completely self-contained, so jump straight to the platform you need. You don’t have to read the whole thing. If you’re still deciding whether Surfshark is the right VPN for you, read our full Surfshark review first.
A few things to know before you start: Surfshark works on unlimited simultaneous devices with a single subscription — one of the very few VPNs that doesn’t cap you at 5 or 6. It supports Windows, macOS, Linux, iOS, Android, Android TV, Apple TV, Fire TV, and browser extensions for Chrome, Firefox, and Edge. Manual setup (via OpenVPN, WireGuard, or IKEv2) also works on routers, gaming consoles, and smart TVs.
The steps below are based on Surfshark’s official apps as of June 2026. If you see a slightly different screen during setup, the flow is the same — the interface occasionally gets updated, but the core steps don’t change.
Before You Begin: Create Your Surfshark Account
Every platform setup starts the same way: you need a Surfshark account with an active subscription. If you haven’t done this yet, here’s what the process looks like.
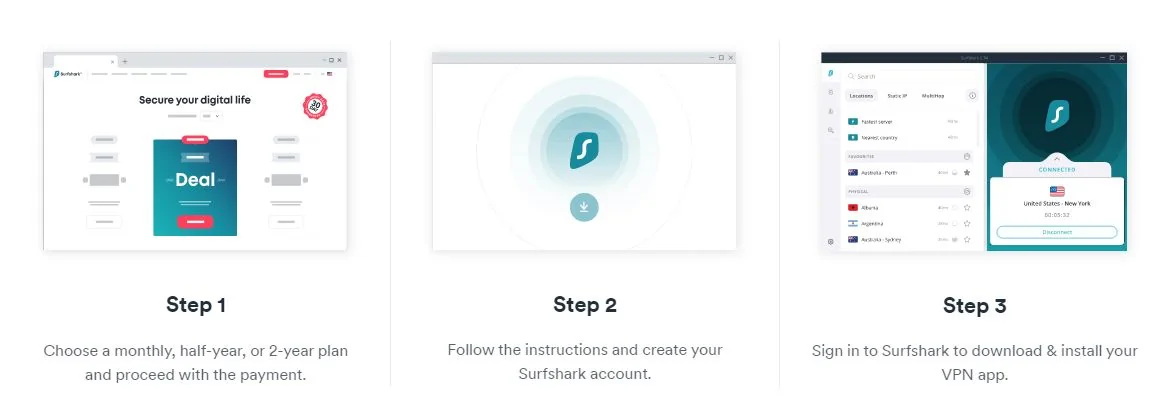
- Go to surfshark.com — Click the Get Surfshark button on the homepage. Plans start at $1.99/month on the 2-year Starter plan, which gives you the full VPN with unlimited devices. The One and One+ plans add antivirus, breach alerts, and data removal tools.
- Choose your plan and pay — Surfshark accepts credit/debit cards, PayPal, Google Pay, and cryptocurrency. All plans come with a 30-day money-back guarantee, so there’s no risk. iOS and Android users can also start a 7-day free trial through the app stores (payment details required; cancel before 7 days for no charge).
- Verify your email — Check your inbox for a confirmation email from Surfshark. Click the verification link. Your account is now active and you can log in on any device using your email and password.
Tip: Save your Surfshark login credentials somewhere accessible — you’ll need them each time you set up the app on a new device. You can also log in via QR code from an already-signed-in device, which is handy for Fire Stick and TV setups where typing on a remote is frustrating.
How to Install Surfshark on Windows (PC & Laptop)
Surfshark has a native Windows app that supports Windows 7, 8, 10, and 11. The app is available in two places: directly from the Surfshark website and from the Microsoft Store. Both versions are identical in features.
Option 1: Download from the Surfshark Website (Recommended)
- Open your browser and go to surfshark.com/download.
- Click Windows under the desktop apps section. The download of a .exe installer file will start automatically.
- Once downloaded, open your Downloads folder and double-click the Surfshark setup file.
- If Windows asks for permission with a UAC prompt, click Yes to allow the installation.
- The installer runs automatically. Wait for it to finish — it usually takes under a minute.
- The Surfshark app opens. Click Log In and enter your account email and password.
- On the home screen, hit the large Connect button for the fastest server, or browse the server list on the left to pick a specific country.
Option 2: Download from the Microsoft Store
- Open the Microsoft Store app on your Windows PC.
- Search for Surfshark in the search bar.
- Click Get on the official Surfshark app (verify the publisher is Surfshark B.V.).
- The app installs automatically. Open it from the Start menu.
- Log in with your Surfshark credentials and connect.
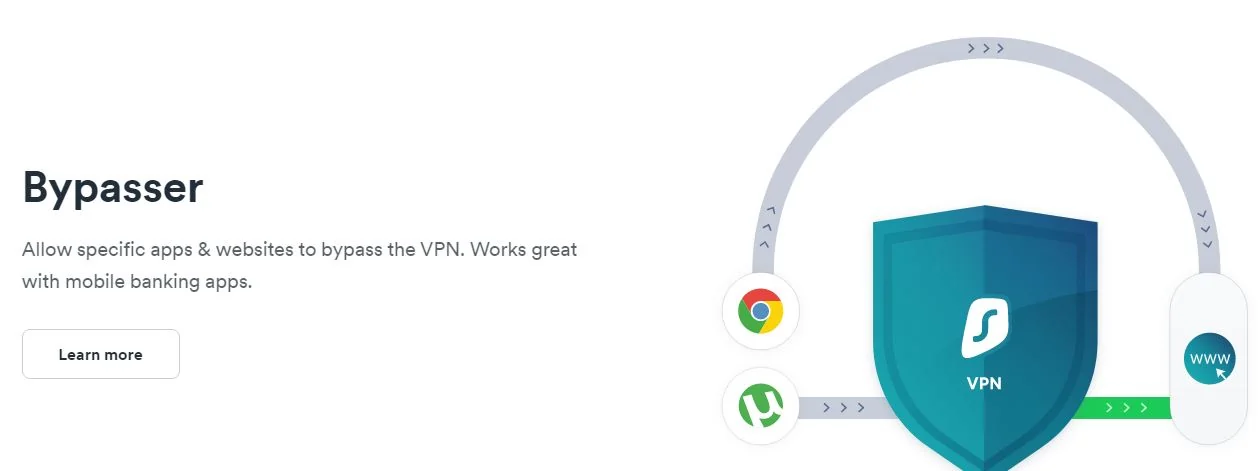
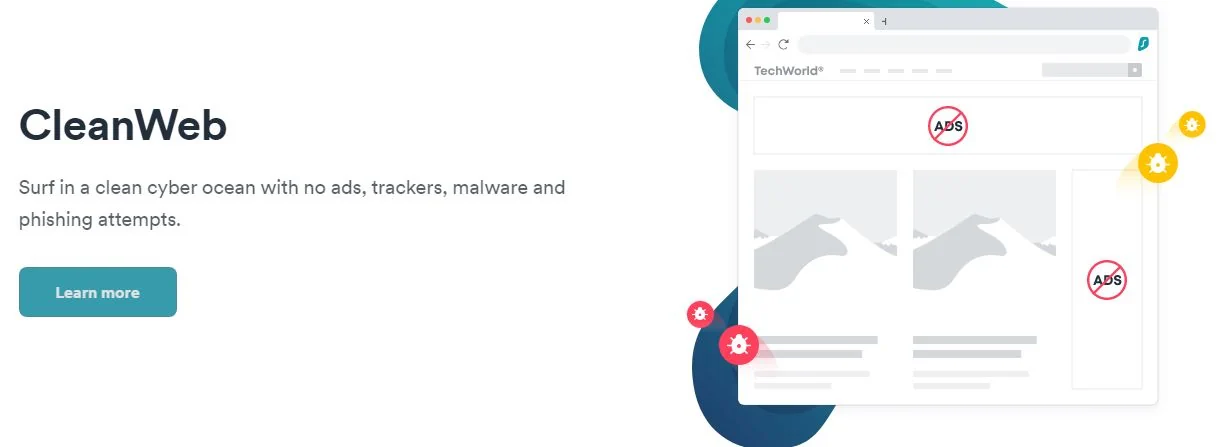
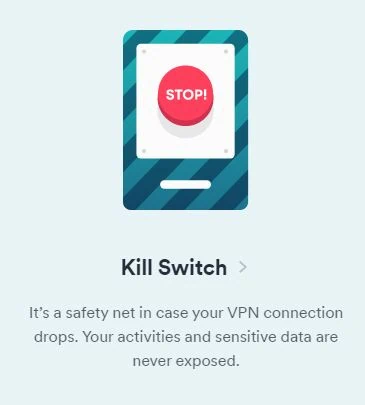
Optional: Customize your settings before connecting. Once logged in, head to the Settings section before hitting Connect. You can enable the Kill Switch (cuts internet if the VPN drops), toggle CleanWeb (ad and tracker blocking), set your preferred protocol (WireGuard is fastest; IKEv2 is more stable on unreliable connections), and configure the Bypasser (split tunneling) to route specific apps outside the VPN.
How to Install Surfshark on Mac
Surfshark supports macOS 10.15 Catalina and later. The Mac app is available from the Surfshark website or the Mac App Store.
Option 1: Download from the Surfshark Website
- Go to surfshark.com/download and click macOS.
- The .dmg file downloads to your Downloads folder.
- Open the .dmg file. A window appears with the Surfshark app icon and a shortcut to your Applications folder.
- Drag the Surfshark icon into the Applications folder.
- Open Launchpad or your Applications folder and launch Surfshark.
- macOS may show a security prompt the first time. If so, go to System Preferences > Security & Privacy and click Open Anyway.
- Log in with your email and password, then connect to a server.
Option 2: Download from the Mac App Store
- Open the App Store on your Mac.
- Search for Surfshark VPN.
- Click Get and authenticate with your Apple ID if prompted.
- Once installed, open Surfshark from Launchpad and log in.
Note: The Mac App Store version and the website .dmg version are functionally identical, but the App Store version goes through Apple’s review process and may receive updates slightly later. Either is fine for everyday use.
How to Install Surfshark on iPhone & iPad (iOS Setup)

The iOS app requires iOS 16 or later. It works on iPhone and iPad. You can also start a 7-day free trial directly from the App Store (payment details required; cancel within 7 days for no charge). If you’re comparing options, see our guide to the best mobile VPN apps for iOS and Android.
- Open the App Store on your iPhone or iPad.
- Tap the Search tab at the bottom and type Surfshark VPN.
- Tap Get on the official Surfshark app. Authenticate with Face ID, Touch ID, or your Apple ID password.
- Once installed, tap Open or find Surfshark on your home screen.
- Tap Log In and enter your Surfshark email and password. (If you’re a new user tapping from the App Store, you can also start the 7-day free trial here.)
- The app asks for permission to add a VPN configuration to your device. Tap Allow and authenticate with Face ID or your device passcode. This is a standard iOS security step — Surfshark needs this permission to route your traffic through its servers.
- Tap the large power button to connect. iOS shows a VPN badge in the status bar when connected.
Tip: In the Surfshark iOS app, go to Settings > Protocol to choose between WireGuard (fastest), IKEv2 (reliable on mobile networks), and OpenVPN. WireGuard is the default and works well in most situations. Switch to IKEv2 if you’re on a spotty mobile connection.
How to Install Surfshark on Android
The Android app requires Android 8.0 (Oreo) or later. It’s available from the Google Play Store, and there’s also a direct APK download for devices that don’t have Play Store access (Huawei, Amazon tablets, older devices).
Method 1: Google Play Store (Standard)
- Open the Google Play Store on your Android device.
- Search for Surfshark VPN.
- Tap Install on the official app (developer: Surfshark B.V.).
- Once installed, tap Open.
- Tap Log In and enter your email and password. Or tap Start free trial if you don’t have a subscription yet.
- When prompted, tap OK to allow Surfshark to set up a VPN connection. This is a required Android permission for all VPN apps.
- Tap the Connect button. The VPN icon appears in your notification bar when active.
Method 2: Direct APK Download (No Play Store)
If your device doesn’t have Google Play (Huawei phones post-2019, Amazon Fire tablets, custom ROM devices), you can download the Surfshark APK directly from surfshark.com/download.
- On your Android device, go to Settings > Security (or Settings > Apps > Special App Access depending on your Android version) and enable Install from Unknown Sources or Allow from this source for your browser.
- Open your browser and visit surfshark.com/download. Tap Android APK.
- Once the APK downloads, open it from your notification tray or file manager.
- Tap Install when prompted.
- Open Surfshark, log in, and connect.
Android-only feature: Surfshark’s GPS Override is available exclusively on Android. It matches your device’s GPS location to the VPN server location, which prevents apps that check GPS coordinates (rather than just IP address) from detecting your actual location. Find it under Settings > Advanced > GPS Override.
How to Install Surfshark on Linux
Surfshark offers a native GUI app for Linux, which is a step up from VPNs that only provide manual config files. The app supports Ubuntu, Debian, Fedora, CentOS, and other major distributions. You can also use the command-line interface if you prefer.
Before you start: You’ll need terminal access and sudo privileges. The commands below come from Surfshark’s official Linux setup guide. Always fetch the installer from surfshark.com/download rather than third-party sources.
Ubuntu / Debian (apt-based distros)
- Open your Terminal.
- Download and add the Surfshark repository key, then add the repository to your system’s sources. Surfshark provides a one-line curl command for this on their download page — visit surfshark.com/download and select Linux to get the exact current command for your distro.
- Update your package list: run
sudo apt-get update - Install Surfshark: run
sudo apt-get install surfshark-vpn - Once installed, launch the app from your application menu, or run
surfshark-vpnin the terminal. - Log in with your Surfshark email and password.
- Connect: either use the GUI or run
surfshark-vpn attack(Surfshark’s CLI command for connect) and follow the prompts.
Fedora / CentOS / RHEL (rpm-based distros)
- Open your Terminal.
- Visit surfshark.com/download and select Linux to get the rpm repository setup command for your exact distro version.
- Install Surfshark using your package manager:
sudo dnf install surfshark-vpn(Fedora) orsudo yum install surfshark-vpn(CentOS/RHEL). - Launch the app and log in as described above.
Useful CLI commands: surfshark-vpn attack = connect | surfshark-vpn down = disconnect | surfshark-vpn status = check connection | surfshark-vpn country = pick server by country. Run surfshark-vpn help to see all available commands.
How to Install Surfshark Browser Extension
Surfshark offers browser extensions for Chrome, Firefox, and Edge. These are lightweight proxy extensions — they only protect your browser traffic, not your entire device. They’re useful for fast server switching while browsing without toggling the full desktop app.
Important: The Surfshark browser extension requires the desktop app to be installed and running on the same computer. The extension connects through the desktop app — it doesn’t work independently. Install the Windows or Mac app first (see sections above), then add the extension.
Chrome Extension
- Open Google Chrome.
- Go to the Chrome Web Store (chromewebstore.google.com) and search for Surfshark VPN.
- Click Add to Chrome on the official Surfshark extension.
- Confirm by clicking Add extension in the popup.
- The Surfshark icon appears in your browser toolbar. Click it and log in using your Surfshark credentials.
- Make sure the Surfshark desktop app is open (it can be minimized), then select a server location from the extension and connect.
Firefox Extension
- Open Firefox.
- Go to addons.mozilla.org and search for Surfshark VPN.
- Click Add to Firefox.
- Confirm the permission prompt.
- Log in via the extension icon in your toolbar with the desktop app running in the background.
Microsoft Edge Extension
- Open Microsoft Edge.
- Go to microsoftedge.microsoft.com/addons and search for Surfshark VPN.
- Click Get and confirm the installation.
- Log in via the toolbar icon with the Surfshark desktop app open.
How to Install Surfshark on Fire Stick & Amazon Fire TV
Surfshark has an official app in the Amazon Appstore, which means setup on Fire Stick is straightforward. No sideloading required for current Fire Stick models (Fire Stick 4K, 4K Max, Fire Stick HD, Fire TV Cube).
Standard Method: Amazon Appstore
- Turn on your Fire Stick and go to the home screen.
- Navigate to the search icon (magnifying glass) in the top navigation bar.
- Type Surfshark using the on-screen keyboard. The Surfshark app should appear as the first result.
- Select the Surfshark app. Confirm the developer is listed as Surfshark to avoid unofficial copies.
- Click Download (or Get). The app installs automatically once the download finishes.
- Open Surfshark. You’ll see a Log In button and an option to scan a QR code.
- If you already have Surfshark on your phone, tap Scan QR code and point your phone’s camera at the screen to log in instantly — much easier than typing with the remote.
- Otherwise, select Log In with Email and type your credentials using the remote.
- A system prompt appears asking to allow Surfshark to set up a VPN connection. Select OK. This only appears the first time.
- Choose a server location from the list and press Connect. You’ll be connected in a few seconds.
Sideloading Method: Older Fire Stick Models
If you have an older Fire Stick model that doesn’t support the latest Appstore version (rare, but it happens), you can sideload the Surfshark APK.
- On your Fire Stick, go to Settings > My Fire TV > Developer Options and enable Apps from Unknown Sources.
- Install the Downloader app from the Amazon Appstore — it’s the standard tool for sideloading on Fire Stick.
- Open Downloader, enter the URL for the Surfshark Android APK (available at surfshark.com/download — select the Android APK version).
- Download and install the APK through Downloader.
- Open Surfshark, log in, and connect.
Settings worth enabling on Fire Stick: After connecting, go to Surfshark’s settings in the app to turn on Auto-connect (reconnects automatically if the VPN drops) and CleanWeb (blocks ads in streaming apps). The Kill Switch is also available — useful if you want your streaming to stop rather than continue unprotected if the VPN disconnects.
How to Install Surfshark on Android TV & Google TV
Surfshark has a dedicated Android TV app. The setup differs slightly depending on whether your device runs standard Android TV or Google TV (like the Chromecast with Google TV).
Android TV (standard)
- On your Android TV home screen, navigate to the Google Play Store.
- Search for Surfshark VPN.
- Select the app (developer: Surfshark B.V.) and click Install.
- Once installed, open Surfshark from the Apps section.
- Log in using the QR code method (scan with your phone) or enter credentials manually using your TV remote.
- Allow the VPN configuration prompt and connect to a server.
Google TV (Chromecast with Google TV)
Google TV runs on top of Android and has Google Play access, but the app browsing experience is slightly different.
- Press the Google Assistant button on your remote and say “Open Google Play Store,” or navigate to it from the apps grid.
- Search for Surfshark VPN and install it.
- If Surfshark doesn’t appear in Play Store search results on your specific Google TV device, download the APK directly: enable Unknown sources in Settings > System > About > Developer options, install the Downloader app from Play Store, and use it to fetch the Surfshark Android APK from surfshark.com/download.
- Open the app, log in, and connect.
How to Install Surfshark on Apple TV
Surfshark has a native Apple TV app for tvOS 17 and later (4th generation Apple TV and newer). If you have an older Apple TV (2nd or 3rd gen), the native app isn’t available — use the router method described below as a workaround.
Apple TV with tvOS 17+ (Native App)
- On your Apple TV home screen, open the App Store.
- Search for Surfshark VPN.
- Select the app and click Get. Authenticate with your Apple ID if prompted.
- Once installed, open Surfshark from the home screen.
- Log in using the QR code (scan with your iPhone or iPad that already has Surfshark installed) or enter your email and password using the on-screen keyboard.
- Approve the VPN configuration prompt and pick a server to connect.
Tip: The QR code login is far faster than pecking out your email with the Apple TV remote. On your iPhone, open the Surfshark app, go to Settings > My Account, and scan the code displayed on your Apple TV screen.
Older Apple TV (Router Method)
If your Apple TV doesn’t support tvOS 17, set up Surfshark on your router. Every device connected to that router — including your Apple TV — will automatically route through the VPN. See the Router section below for full instructions.
How to Install Surfshark on a Router
Installing Surfshark on your router protects your entire home network at once. Every device that connects to that router — smart TVs, gaming consoles, IoT devices, older Apple TVs — gets VPN protection without needing a separate app. This is the only practical way to use a VPN on devices that don’t have native app support.
Requirement check: Not all routers support VPN client configuration. You need a router that supports OpenVPN, WireGuard, or IKEv2 as a client. Popular compatible routers include ASUS routers with AsusWRT firmware, DD-WRT routers, and Tomato firmware routers. Most ISP-provided routers do not support this — check your router’s manual or settings for a “VPN Client” section.
Option 1: FlashRouters (Pre-Configured)
The easiest path is to buy a router from FlashRouters.com — they sell pre-configured routers with Surfshark already set up. You just plug it in, connect to the Wi-Fi, and you’re protected. No technical setup required. Surfshark’s website links to FlashRouters as the recommended router option for most users.
Option 2: Manual Setup on ASUS Router (AsusWRT)
- Log in to your ASUS router’s admin panel by entering 192.168.1.1 (or your router’s IP) in your browser.
- Navigate to VPN > VPN Client.
- Click Add profile and select the protocol — OpenVPN is the most widely supported on AsusWRT.
- Log in to your Surfshark account at my.surfshark.com, go to VPN > Manual Setup > Router, and download the OpenVPN configuration files for your chosen server location.
- Also note your Surfshark service credentials (separate from your login email/password — find them in the Manual Setup section of your account dashboard).
- Back in your ASUS router admin, upload the .ovpn file, enter your Surfshark service credentials, and save.
- Activate the VPN connection. Your entire network is now protected through Surfshark.
Option 3: Manual Setup on DD-WRT or Tomato Routers
DD-WRT and Tomato routers support OpenVPN natively. The process is similar: log in to your router’s admin panel, find the OpenVPN client section, and upload the .ovpn configuration file from your Surfshark account’s Manual Setup page. Surfshark maintains detailed step-by-step guides for specific DD-WRT and Tomato models in their support center at support.surfshark.com.
How to Install Surfshark on Smart TV
Samsung and LG smart TVs (running Tizen OS and webOS respectively) don’t have a native Surfshark app you can install from their app stores. You have two options depending on your TV model.
Option 1: Router Method (Works on All Smart TVs)
The most reliable approach for any smart TV is to install Surfshark on your router. Your TV connects to the router as normal, and all traffic automatically routes through the VPN. See the Router section above for full instructions.
Option 2: Smart DNS (Samsung / LG TVs)
Surfshark doesn’t advertise a Smart DNS feature of its own, but if you’re primarily interested in accessing geo-restricted streaming (not full privacy protection), you can configure your Samsung or LG TV’s DNS settings to point to a DNS server — check your Surfshark account’s manual setup section for supported configurations.
Option 3: Use a VPN-Protected Device as Your Streaming Source
Another practical workaround: connect a Fire Stick or Android TV box (with Surfshark installed) to your smart TV’s HDMI port. Use the streaming device rather than the TV’s built-in apps. This gives you full VPN protection and is often faster than manual router setup.
Quick summary for smart TVs:
Android TV / Google TV = native app available (see above)
Amazon Fire TV = native app available (see above)
Apple TV (tvOS 17+) = native app available (see above)
Samsung Tizen / LG webOS = router method or external streaming device
Troubleshooting Common Surfshark Installation Issues
Most Surfshark issues resolve with one of three actions: restarting the app, switching the VPN protocol (go to Settings > Protocol), or trying a different server. Here are the most common problems and their fixes.
Can’t Connect to Any Server
- Check your internet connection — Surfshark needs an active internet connection to establish a VPN tunnel. Disconnect from the VPN, confirm your regular browsing works, then reconnect.
- Switch protocols — Go to Settings > Protocol and switch from WireGuard to IKEv2 or OpenVPN. Some networks (corporate networks, hotels, airports) block WireGuard’s UDP ports. IKEv2 and OpenVPN (TCP mode) are more likely to work on restricted networks.
- Enable NoBorders mode — If you’re in a country with heavy internet censorship (China, Iran, Russia), turn on NoBorders mode in Settings. It selects servers and protocols that are more likely to bypass VPN blocking.
- Try a different server — Occasionally a specific server is overloaded or down. Pick a server in a nearby country and try again.
VPN Configuration Error on iOS
- If the VPN profile fails to install on iPhone, go to Settings > General > VPN & Device Management on your iPhone and delete any existing Surfshark VPN configuration entries.
- Reinstall the Surfshark app from the App Store, log in fresh, and allow the VPN configuration prompt again.
- If the issue persists, restart your iPhone and try once more before reinstalling.
Linux Installation Dependency Errors
- If apt or dnf reports missing dependencies during installation, run
sudo apt-get install -f(Ubuntu/Debian) orsudo dnf install --fix(Fedora) to resolve them automatically. - Make sure your system is fully updated before installing:
sudo apt-get update && sudo apt-get upgradeon Debian-based systems. - If your Linux version is very old (Ubuntu 18.04 or earlier), you may need to upgrade your OS — Surfshark’s current app requires a more recent glibc version.
Browser Extension Not Working
- The most common cause: the Surfshark desktop app is not running. Open the desktop app first (it can sit in the system tray/menu bar), then try the extension again.
- If the extension shows as connected but your IP hasn’t changed, clear your browser cache and cookies, then close and reopen the browser.
- Try disabling other browser extensions temporarily — some ad blockers or privacy extensions can conflict with VPN extensions.
Surfshark Installed But Keeps Disconnecting
- Enable Auto-connect in settings so the app reconnects automatically on network changes.
- Turn on the Kill Switch — this prevents your device from sending data outside the VPN if the connection drops, and prompts faster reconnection.
- On mobile, check if your battery optimization settings are killing the Surfshark app in the background. On Android: go to Settings > Battery > Battery Optimization and exclude Surfshark from optimization.
Frequently Asked Questions: How to Install Surfshark
Is Surfshark free to install?
The Surfshark app is free to download on every platform — Windows, Mac, iOS, Android, Linux, Fire Stick, and Apple TV. But you need a paid subscription to use it. Surfshark plans start at $1.99/month on a 2-year plan. iOS and Android users get a 7-day free trial via the app stores (payment details required to activate; cancel before 7 days to avoid any charge). All plans include a 30-day money-back guarantee, so you can get a refund if you’re not satisfied within the first month.
How many devices can I use Surfshark on at once?
Surfshark allows unlimited simultaneous connections on a single subscription. This means you can have Surfshark running on your phone, laptop, tablet, smart TV box, and router all at the same time — with one account. Most other VPNs cap you at 5 to 8 devices simultaneously, so this is one of Surfshark’s clearest advantages.
Can I use the same Surfshark account on multiple devices?
Yes. One Surfshark account works across unlimited devices simultaneously. You install the app separately on each device and log in with the same email and password. You can mix and match platforms — Windows, iPhone, Android TV, Fire Stick, router — all running from one subscription.
Which platform has the best Surfshark app?
The Windows and macOS apps are the most feature-complete, offering every protocol option (WireGuard, IKEv2, OpenVPN, Dausos), all advanced features like Dynamic MultiHop and Rotating IP, and the Bypasser (split tunneling). The Android app comes close and uniquely adds GPS Override. The iOS app is solid but has fewer protocol options due to Apple’s restrictions. Linux has a fully functional CLI and GUI. The browser extensions offer a subset of features and require the desktop app running.
Does Surfshark work on Chromebook?
Yes. On a Chromebook, you have two options. First, install the Surfshark Android app from the Google Play Store — Chrome OS supports Android apps. Second, install the Chrome browser extension (though this only protects browser traffic). The Android app is the better choice since it protects your whole Chromebook, not just the browser.
What VPN protocols does Surfshark use?
Surfshark supports four protocols:
- WireGuard — fastest, recommended for most users; achieves 1,000+ Mbps in lab tests
- IKEv2 — stable and reliable, great for mobile devices that switch between Wi-Fi and cellular
- OpenVPN — widely trusted, solid on 825 Mbps; good for networks that block WireGuard
- Dausos — Surfshark’s proprietary protocol, built from scratch; quantum-resistant encryption, efficient on lower-powered devices
Can I install Surfshark without downloading the desktop app?
You can’t use Surfshark’s browser extensions without the desktop app — the extension routes traffic through the desktop app. However, you can set up Surfshark on your router without any app on individual devices. Manual configuration using OpenVPN, WireGuard, or IKEv2 config files (available from your Surfshark account’s Manual Setup section) also lets you connect without the dedicated app on routers, NAS devices, and some other platforms.
Does Surfshark slow down my internet?
All VPNs add some overhead because your traffic is encrypted and routed through an additional server. In practice, Surfshark is one of the fastest VPNs available — lab tests clocked 1,021 Mbps median download speed on WireGuard with a local server, and 935 Mbps on long-distance connections. If your base internet speed is under 500 Mbps, you likely won’t notice any difference. On slower connections or when connecting to distant servers, you may see a 10–20% speed reduction, which is typical for any VPN.
How do I know if Surfshark is working after installation?
The easiest way: visit a site like whatismyip.com before and after connecting. Your IP address should change to one in the server location you selected. The Surfshark app also shows a clear “Connected” status with your new IP. On iOS, a “VPN” badge appears in the status bar. On Android, a key icon appears in the notification bar.
What should I do if the Surfshark app won’t open after installation?
First, restart your device. If it still won’t open, uninstall the app completely, restart again, and reinstall a fresh copy from surfshark.com/download or your device’s app store. On Windows, also check whether your antivirus software is blocking the app — add Surfshark to your antivirus’s exclusion list if needed. On Mac, check System Preferences > Security & Privacy for any blocked app notification.
Is installing Surfshark on a router worth it?
It depends on what you need. Router-level installation is worth it if you want to protect devices that don’t support VPN apps (Samsung/LG smart TVs, older Apple TVs, gaming consoles, smart home devices) or if you want every device on your home network protected automatically without remembering to turn on the VPN. The downside: you typically can’t easily switch servers for individual devices once the router is configured, and setup is more technical. If you want per-device control, install the app on each device separately.
Can I install Surfshark on a gaming console like PS5 or Xbox?
PS5 and Xbox don’t support VPN apps directly. Your two options are the router method (set up Surfshark on your router so all traffic including the console goes through the VPN) or the “VPN sharing” method (connect your laptop to Surfshark, share that connection via Wi-Fi hotspot or ethernet to the console). The router method is more stable for gaming. Surfshark’s support center has specific guides for both PlayStation and Xbox setup.
Ready to Install Surfshark on Your Devices?
One subscription, unlimited devices, 4,500+ servers across 100 countries — and a 30-day money-back guarantee if it’s not right for you.
Download Surfshark Now →